August is such an interesting month for a new homeschooling mom. Many of my friends are showing photos of their kids on their first day of school. They have all nervously planned and anxiously awaited for that climactic first day. In contrast, things seem a bit anti-climatic and relaxed around here. We have been “schooling” all summer so we are just continuing on with our lessons into the fall. Still, it’s a good opportunity for me to stop for a minute and make sure we are on the right track and plan a few new things to gradually add in as we enter the Fall.
This is our schedule now and probably for the next few months:
- 7:00-8:30 – Wake, dress, brush teeth, eat bowl of cereal, morning chores, free playtime
- 8:30-9:00 – Breakfast, Morning Basket (Bible Reading, Scripture Memorization, Read-Aloud)
- 9:00-9:30 – Independent playtime, Mom rests, checks email, etc.
- 9:30-10:00 – Calendar, History Read-Aloud (20 minutes), Reading or Math Lesson (10 minutes)
- 10:00-10:15 – Snack
- 10:15-11:30 – Play outside, run errands, go to the library
- 11:30-12:00 – Lunch
- 12:00-1:00 – Play outside in backyard, go to a park or playground
- 1:00-4:00 – Rest time, naps, quiet read-alouds
- 4:00-dinner – Play outside
 For Bible, we are reading The Story for Kids by Zonderkids publishers. We read a passage and then discuss. It starts in Genesis and reads as a narrative all the way through the Bible.
For Scripture Memorization, we are using the Simply Charlotte Mason Scripture Memory System. Bud learns about one verse a week and Peanut learns one about every 3-4 months. This is one of my favorite parts of the day. I love hearing the Word of God spoken by my sweet children.
 For Morning Basket read-alouds, we currently read a fun, light book that both my 2 and 4 year old can enjoy. We just read a couple pages a day even if there is only a little text. They get very excited about this. Right now, we are reading Oscar Otter by Nathaniel Benchley. Eventually, I would like to add a picture/artist study to the Morning Basket. That will probably come as we settle into the Fall. We also do a Hymn study once or twice a week. We get out our big basket of instruments and the kids bang on drums and squeak their recorders while I sing the lyrics. It’s chaotic but effective. On the way home from our errands today, Bud (self-initiated) sang “Christ Arose” about 10 times.
Currently, Peanut reads and plays by herself while I work with Bud independently during our 9:30-10:00 “school time”.
For the Calendar time, Bud and I say the Pledge of Allegiance, point out the weather, and move markers on a calendar to learn the months, days, and days of the week. I have Bud show me the number of the date with the abacus (“19 is a ten and a nine”) as an intro to RightStart Math (which uses the abacus).
 For our History read-alouds we are reading books from booklists in The Picture Perfect Childhood by Cay Gibson. She lists them thematically by month so I always have a source to find living books in alignment with the time of year. Today we read Escape from Pompeii by Christina Balit. Bud loved it! He asked me to read it again this afternoon and was talking about volcanoes all morning. Many times, a short geography lesson will occur after these read-alouds because Bud wants to know where the story took place. We had a great discussion about Italy this morning after reading about Pompeii.
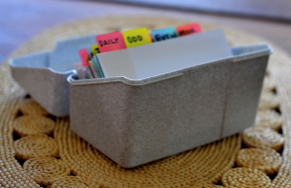
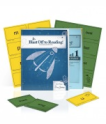
Our Reading lessons are taken from All About Reading, Level 1. Bud has thrived with this phonics curriculum and is reading better than I think I did when I was 6!
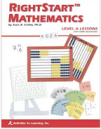
Our Math lessons come from RightStart Math, Level A. We just started this last week and Bud loves it. We will move very slowly through the math lessons and only do them when he wants to.
Peanut will join in and participates when she wants, but she is free to be two and just play all day. She loves to color and help me cook. She is learning from just living and being a toddler right now. I will save her “formal education” for a much later date. 🙂
I would also eventually like to plan weekly field trips to museums, orchestra concerts, and other interesting places. We will add these in as there is time and energy. I have been in conversations with a good friend of mine about starting a homeschool field trip and nature study group. We both agreed to wait until our kids are a little older but that might come sooner if it feels right.
That’s about it for our family. Hooray for homeschool!

